# Defining Animator transitions
You can use the Animator controller to control how an object transitions between different animation clips. This requires an Animator component on the object for which you want to control animations. When you use the Animation Window to add animations to an object in Unity, an Animator component is added automatically. For more detailed information, refer to the [Animation Controller](https://docs.unity3d.com/2021.3/Documentation/Manual/class-AnimatorController.html) page in the Unity documentation.
## Creating a transition
A transition defines when the Animator should change from one animation clip to another. To add a transition, complete the following steps:
1. In the **Hierarchy** panel, select the object that you want to define transitions for.
2. From the **Window** menu, select **Animation** > **Animator**.
3. **Optional**: To set the default state, right-click an animation, and then select **Set as Layer Default State** from the menu that appears.
4. Complete the following steps for each transition that you want to create:
1. Right-click the animation that you want to transition from, and then select **Make Transition** from the menu that appears.
2. Select the animation that you want to transition to.
Right-click menu to make a transition
When the Animator plays an animation clip that has a transition, it will automatically follow that transition after the animation clip finishes playing. If you want to control when the Animator will follow a transition, one option is to use triggers. See the following section for more information.
## Adding transition triggers
If you add a trigger to a transition, the Animator will follow the transition only when the trigger has been activated. After a trigger has caused a transition to be followed, the trigger is reset.
To create a trigger and apply it to a transition, complete the following steps:
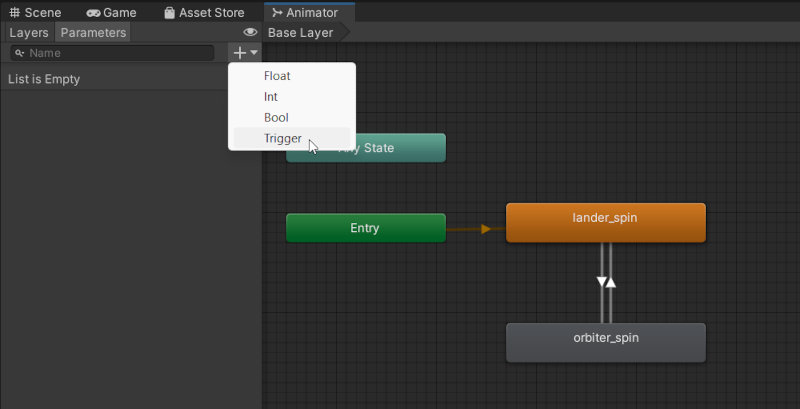
1. In the **Animator**, select the **Parameters** tab.
2. From the plus menu, select **Trigger**.
Adding a transition trigger
3. Enter a name for the trigger.
4. In the Animator canvas, select the transition that you want to trigger.
5. In the **Inspector** panel, in the **Conditions** list, select the plus symbol.
6. From the list that is added, select the trigger that you want to activate the transition.
Selected transition and Conditions list
## Testing transition triggers
When Unity is in play mode, you can access the Animator panel, and then select triggers to test the transitions.
Example test of transition triggers in an animation
---
# Agent Instructions: Querying This Documentation
If you need additional information that is not directly available in this page, you can query the documentation dynamically by asking a question.
Perform an HTTP GET request on the current page URL with the `ask` query parameter:
```
GET https://docs.engagevr.io/developer/creating-locations/network-states/example-network-state-configurations/network-state-change-animation/defining-animator-transitions.md?ask=
```
The question should be specific, self-contained, and written in natural language.
The response will contain a direct answer to the question and relevant excerpts and sources from the documentation.
Use this mechanism when the answer is not explicitly present in the current page, you need clarification or additional context, or you want to retrieve related documentation sections.