Keys for the Position.y parameter connected by a green track - with the Position.x and Position.z tracks hidden

Keys for the Position.y parameter connected by a green track - with the Position.x and Position.z tracks hidden

Location of the box select icon and example of box selection in use
 .
## Restricting key movement
You can use the toggles on the right-hand side of the the curves timeline to restrict key movement to a specific axis. Select an icon to enable that restriction.
| Icon | Effect | Keyboard shortcut |
| --------------------------------------------------------------------------------------------------------------------------------------------------------------------------------------------------------------------------------------------------------------- | ----------------------------------------------------------------------------- | ----------------- |
|  | No restrictions. You can drag a key freely in both axis. | None |
|  | Restrict a key to vertical movement. This changes the value of the parameter. | Left Shift key |
|  | Restrict a key to horizontal movement. This retimes the key. | Right Shift key |
## Setting exact positions for keys
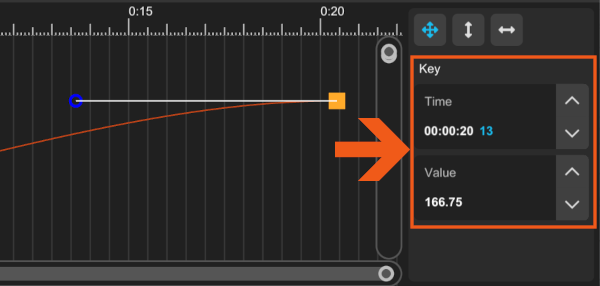
* To select an exact time or value for a key, first select the key, and then use either the spinners or the numeric input fields.
.
## Restricting key movement
You can use the toggles on the right-hand side of the the curves timeline to restrict key movement to a specific axis. Select an icon to enable that restriction.
| Icon | Effect | Keyboard shortcut |
| --------------------------------------------------------------------------------------------------------------------------------------------------------------------------------------------------------------------------------------------------------------- | ----------------------------------------------------------------------------- | ----------------- |
|  | No restrictions. You can drag a key freely in both axis. | None |
|  | Restrict a key to vertical movement. This changes the value of the parameter. | Left Shift key |
|  | Restrict a key to horizontal movement. This retimes the key. | Right Shift key |
## Setting exact positions for keys
* To select an exact time or value for a key, first select the key, and then use either the spinners or the numeric input fields.

Spinners and numeric input fields to set an exact time and value for a key